

Working with multiple FPGAs connected to the PC
When you have more than one FPGA board connected to your PC, you need to know how to select the board you want to program or debug.
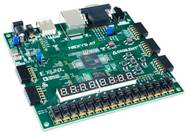
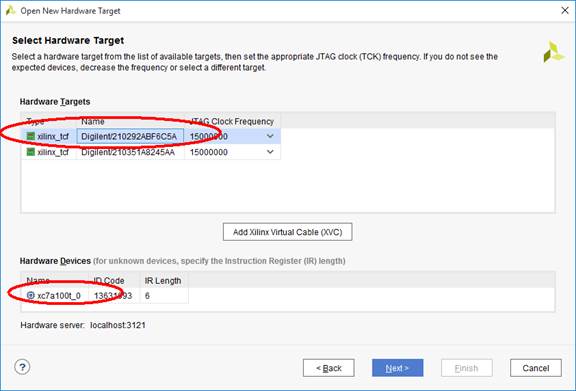
If you want to work with Nexys A7 board, then you need to select the device xc7a100t.
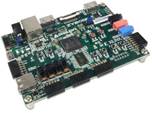
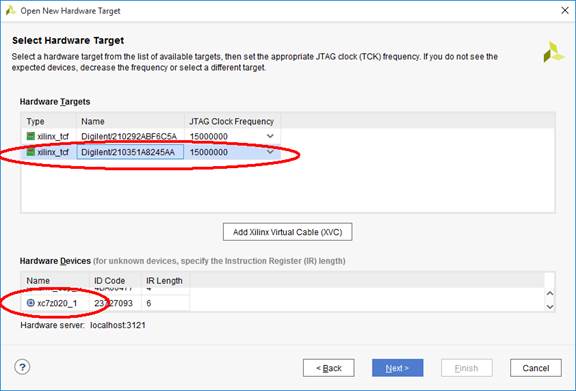
If you want to work with Zybo board, then you need to select the device xc7z020.
Selecting the board in Vivado
To select the board in Vivado, in the section PROGRAM AND DEBUG of Navigator Flow, select Open Hardware Manager and then Open Target:

or:
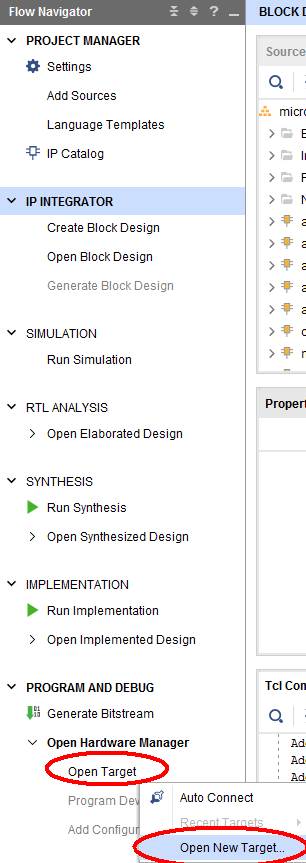
then select Open New Target...
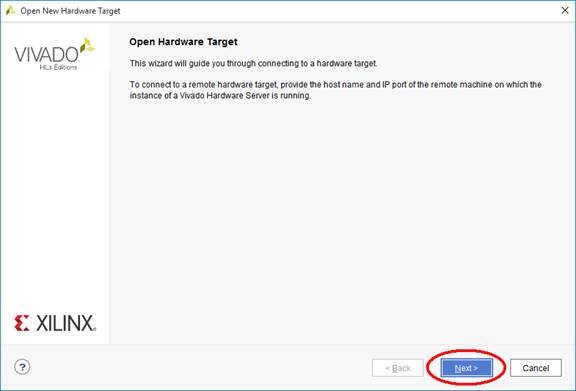
In the first window of the wizard, just click Next:
and again Connect to the Local server. Click Next.

If you select one of the programming interfaces (Hardware Targets window), below you will see the devices available (Hardware Devices window):
If you select different Hardware Target, you will see different devices in Hardware Devices window:
In the last window just click Finish.
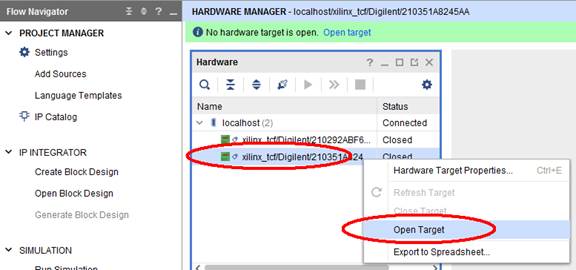
If you see the programming cables in the Hardware window, you can also select the device for programming:

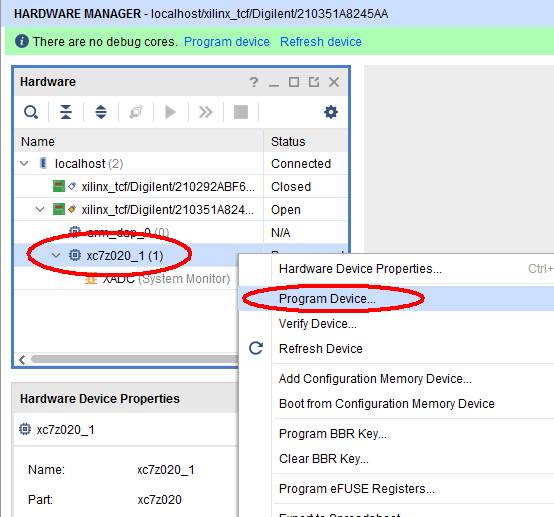
When you have the target connected, right-click on the FPGA device (xc7z020 or xc7a100t, depending on the board you want to work with), and select Program Device:
Selecting the board in Xilinx SDK
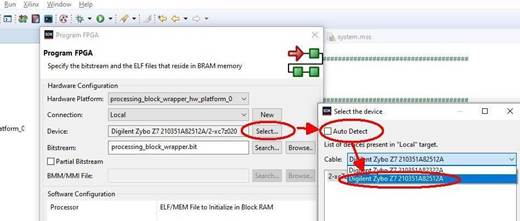
Programming the FPGA in SDK
To select the board in Xilinx SDK, at FPGA programming you need to select the device as shown below:
Running the software – Nexys board
To run the software, you also need to select the appropriate device:
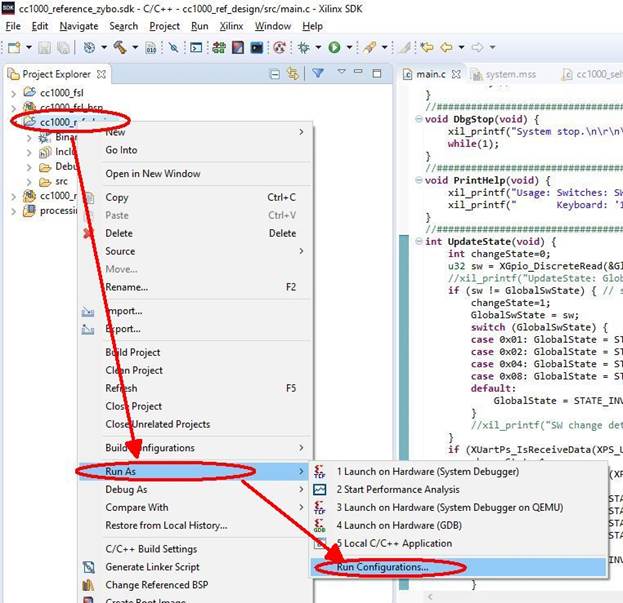
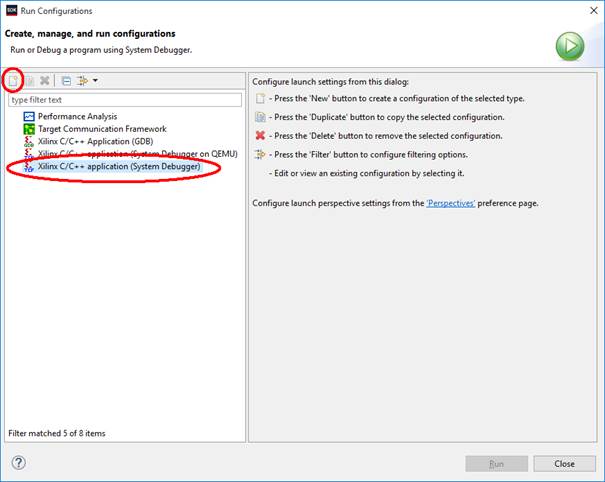
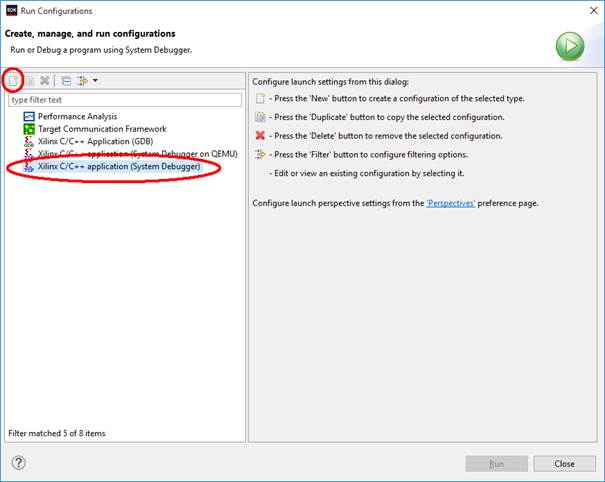
In the next window select Xilinx C/C++ application (System Debugger) and click the „New” icon:
Next you will have to select (using Select button) the FPGA device xc7a100t to be programmed. Uncheck Auto Detect.
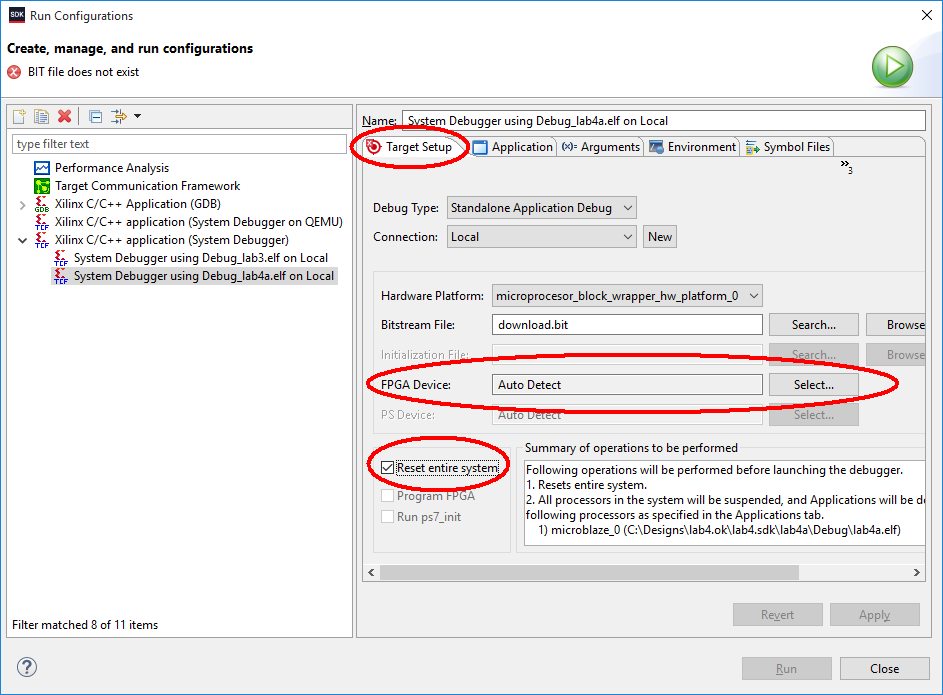
It is also useful to select Reset entire system (to reset also hardware peripheral devices), because only processor is reset by default. At the end click Apply and Run.
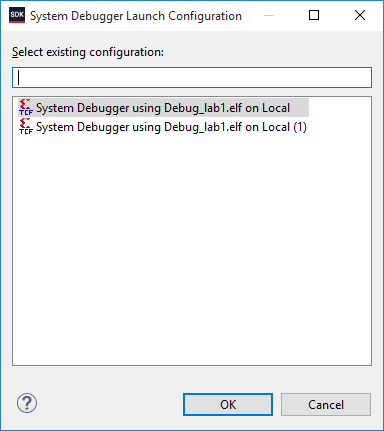
Finally, having set the run configuration, the further runs can be simplified:
If more run configurations are saved, you will be asked which one you want to use:
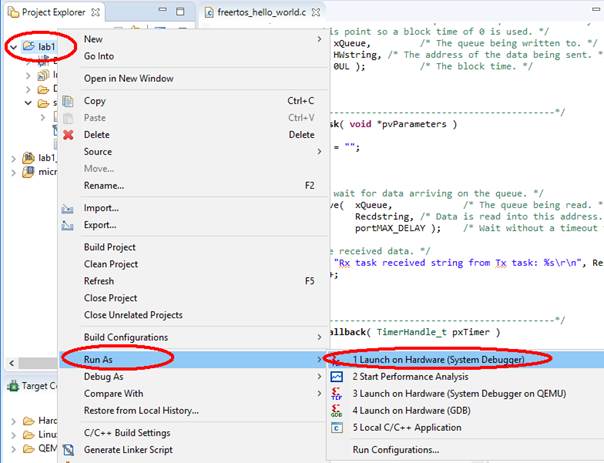
Running the software – Zybo board
To run the software, you also need to select the appropriate device:
In the next window select Xilinx C/C++ application (System Debugger) and click icon "New":
In Zybo there are two subsystems for programming: FPGA (PL) and processor (PS) subsystem. You have to select the programmer and device used for each of the subsystem, using the button Select:
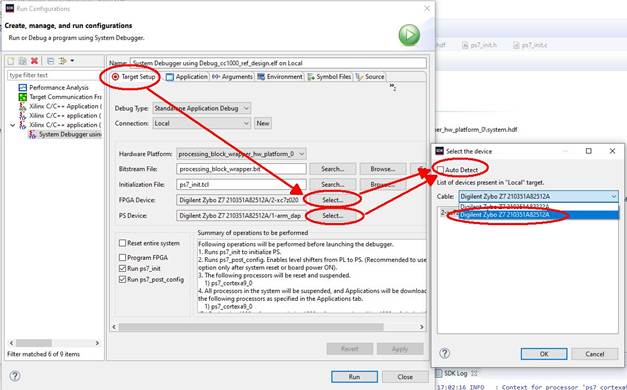
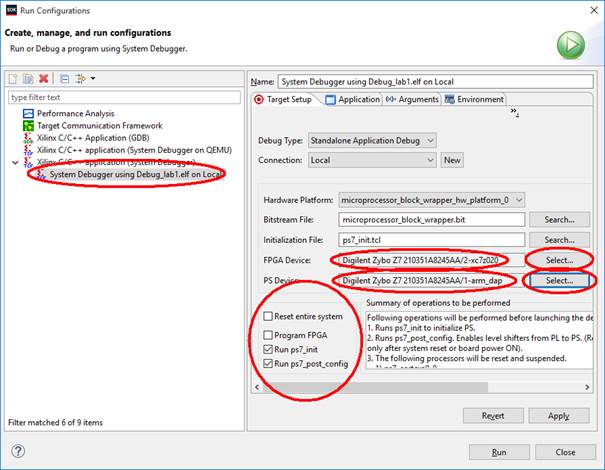
Please note, that selecting Reset entire system will erase the FPGA subsystem before running the software! If you decide to use this option, you should also select Program FPGA. At the end click Run and Apply.
Finally, having set the run configuration, the further runs can be simplified:

If more run configurations are saved, you will be asked which one you want to use:
Change history
Adaptation to version Vivado 2018.3: M.Wójcikowski (08/2020)